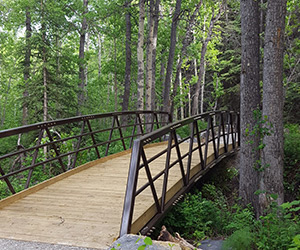
A bridge is a great way to showcase your facility or business. Whether you need the simplest possible structure to cross your stream or roadway, or want to provide something your customers or clients will notice, there is a pedestrian bridge out there that’s right for you.
But the options can be dizzying. Pedestrian bridges can be made out of steel, wood, or composite material. They can have wood, concrete, or asphalt decks. Appurtenances like railings have several options. And paint type and color is an aesthetic factor as well as longevity concern.
There is no standard bridge length, width, and height, although several companies have pre-designed options. Even then, many people find that the pre-designed options are conservative (usually designed for highway loading) and they could have saved money by going the custom route. And if abutments require engineering design, or environmental permits are required, these are generally not available from a pre-designed bridge manufacturing company.
Google searching tends to bring up specialty manufacturers or suppliers who represent and promote a certain type of product, and it often won’t be immediately obvious what their specialty is without doing some research.
In this article, we will attempt to lift the veil and answer as many questions about pedestrian bridges as we can.
Types of Pedestrian Bridges
Pedestrian bridges fall into 3 general categories:
- Truss
- Girder (Beam)
- Arch
Truss
 Trusses can be used at almost any site. They can be built in span ranges from 30 ft (10 m) to about 200 ft (67 m). They can be built to any width, and can be designed to accommodate vehicles as well.
They are generally made out of steel. Although wooden trusses can be built, the relative weakness of the connections would limit the bridge spans to somewhere in the range of about 60 ft (20 m). Composite materials like Fibre Reinforced Polymer (fibreglass) can be used as well. They allow for span lengths similar to steel but because only bolted connections are possible (no welding) the truss options are somewhat limited.
The options for the deck are:
- Wood is generally the cheapest but needs to be replaced about every 15 or so years.
- Concrete is fairly expensive and has a high dead load (self weight) which could require a larger truss (more cost), however it is very aesthetic.
- Asphalt has the same pros and cons as concrete. The cost is also similar, the main difference between asphalt and concrete being a stronger skid resistance for vehicle tires.
- Steel grate is still relatively affordable but its transparency can be uncomfortable for some users.
When the primary use is for pedestrians, trusses should be built with a camber (upward bow) to ensure the bridge never contains a downward bow under loading. A downward bow creates an alarming situation for the travelling public, even if the bridge is not actually in danger of failing. It also allows for more water flow or vehicle clearance underneath the bridge.
Ideally, trusses are fabricated in the plant and delivered to the site as one piece. However, in some cases the bridge is too long or must otherwise be assembled at site. This does not result in any structural issues but a small additional cost (approx. 10%) must be factored in to account for the additional bolts, welding, and installation.
Girder (Beam)
Most highway and city bridges are built with girders (beams) spanning the opening and a deck placed perpendicularly over it. The load is taken by the girders, underneath the traffic. The side railing is not a structural element; It simply keeps the traffic on the bridge.
They can be built any length, width, deck type, or material, from a small creek bridge to a large highway bridge. Technically, a log placed across a stream is a girder.
There is no real restriction on the number of girders, width, deck type, or railing type. All of the options can be built relatively easily with only the cost being the major differentiator.
The cost of girder bridges increases exponentially with their size. That is, the longer the span, the bigger the girders need to be, and hence the bigger the cost per square foot of bridge. To put it another way, the amount of steel under each square foot is higher if the girders are larger. At a length of roughly 40 ft (13 m), plus or minus, girder bridges usually approach their prohibitive cost point for most applications. A pier can be built to limit the span, but naturally this comes with a corresponding cost as well.
Arch
Arch bridges can be very aesthetic. They consist of corrugated steel or precast concrete plates on cast-in-place foundations, and they require good quality backfill around the structure. They can have an aesthetic retaining wall on the outside face, rock riprap, or just grass.
Arches can make excellent pedestrian structures but they are not always an option. Depending on the geometry of the site, an arch might require importing alot of gravel backfill. It might also be a very long, dark structure for pedestrians.
Manufacturers of arches will generally include the design of the structure in their prices to supply the structure. However, they will not do any design outside of the “backfill envelope,” that is, site plans or the like. If you need anything more than a structural design of the structure and related backfill, their insurance requirements will force them to decline and you will need to hire an engineer.
Pedestrian Bridge Abutments
 Bridge abutments can come in many different forms depending on the size of the bridge and loading conditions. But generally, the options will fall into the following categories:
- For the smallest bridges, say up to 60 ft (20 m), either precast concrete blocks or jersey barriers work well. The base below the precast units should be well graded, compacted gravel.
- Medium size bridges with a length of 60 ft to 120 ft (20 m to 40 m) should implement more competent abutments. They should be cast-in-place concrete or steel, and they should be on footings or piles. They should be engineered and include a geotechnical investigation which includes drilling to determine the subsurface conditions.
- Long bridges greater than 120 ft (40 m) in span should be engineered and will likely require piles.
These should be viewed as rough guidelines as they can vary quite substantially based on the site conditions.
Hydrology
If the bridge is spanning a watercourse it must withstand the required design flood. This depends on the jurisdiction and governing building code but the target usually ranges from 1:100 years in the city down to 1:25 years for remote, low traffic bridges.
The determination of a design flow level is generally outside of the abilities of non-engineering staff. The steps are:
- Survey the site to determine average stream cross-sections and geometry.
- Determine the drainage area of the site.
- Gather precipitation data from the appropriate source.
- Use standard procedures applicable to the jurisdiction, such as the rational method, NRCS method, or unit hydrograph method to determine the 1:100, 1:50 year, or 1:25 year flow for the site from the precipitation and drainage basin data. Since the drainage basin can have several different rainfall distributions in different areas, civil engineers normally use specialty computer software to determine the design flow.
- Use Manning’s equation to determine the flow characteristics at the site, in particular the height (depth) of flow and its velocity. Determine the stream cross-section under the bridge that meets the criteria and calculate the bridge length.
Cost of Pedestrian Bridges
Naturally, the cost of pedestrian bridges can vary quite a bit based on location, shipping requirements, and other factors, but I will try to give a bit of guidance here. The fabrication and delivery of a pedestrian bridge will roughly fall into the following ranges.
- Steel Truss: $90 – $130/ft2 ($970 – $1,400/m2)
- Steel Girder: $100 – $140/ft2 ($1,080 – $1,500/m2)
- Wooden Girder: $40 – $60/ft2 ($430 – $650/m2)
This does not include the installation (construction), which is generally about the same as the fabrication. If there are major obstacles to the construction of the bridge, such as site access, ground conditions, and so forth, an additional amount should be budgeted for bridge construction. Also, a concrete deck or abutments will require a roughly 25% premium on the bridge fabrication.
Where to Buy Bridges
If you require a small bridge with a length of less than about 35 ft (10 m), many welding shops exist that can produce a small steel bridge. They will usually have an engineer who can stamp the bridge, but designing bridges is a specialty only a few will possess (they will specialize in analyzing industrial machinery). In either case, local options are likely the cheapest.
For bridges larger than this, pre-engineered and pre-designed bridges are available from several larger manufacturers who will ship throughout North America. A few examples are:
The advantages of this approach are the speed and cost of pre-designed bridges. The disadvantages are that they can mismatch to the site in a certain way, such as design loading, skew, height, etc. and this will result in unnecessary cost. They will generally be pre-designed to highway loading which, if not necessary, will result in larger steel members and higher cost. They supply the bridge only, and do not design foundations or provide permitting or hydrological support. Hence, an engineer is often still required to deal with site-specific conditions and a contractor to build the abutments.
Hiring an engineer first can add value. Although it represents an initial up-front cost, the engineer can ensure steel truss members are not oversized and ensure permitting and design flow requirements are met. For a cost of roughly 10% of the project cost, there are corresponding savings in the fabrication and construction of the bridge.
Abutments
Bridge foundation options depend on the soil conditions, but generally include the following (from heaviest to lightest):
- Piles (steel or concrete)
- Cast-in-place concrete footings
- Cast-in-place concrete on screw piles
- Precast concrete blocks
For larger bridges a geotechnical investigation, which includes drilling, might be necessary. For smaller bridges where this is not feasible, soil conditions can be estimated and various techniques can be employed, for example precast concrete blocks utilizing the minimum under-excavation for footings.
If you are located in the western Canadian provinces of British Columbia, Alberta, Saskatchewan, or Manitoba, we have a suite of in-house pre-designed pedestrian bridges as well as manufacturing and construction partners to provide a full turnkey (design and construction) solution. We can also offer support with any other issue such as hydrology, abutment design, bridge repairs, and so forth. Please see our prefabricated bridge options.
How to Install Pedestrian Bridges
A contractor may be necessary to install the bridge, and the costs for that vary quite drastically based on the site conditions. The abutments, depending on what type you are using will require some excavation and backfill (compaction) and/or concrete pouring equipment. Generally, the steps are as follows:
- Assemble the bridge on site.
- Excavate to the minimum elevation required for structural stability (more guidance on this below).
- Backfill with well graded gravel up to the foundation level.
- Place the foundation.
- Move the bridge onto the foundation.
- Complete the path/road.
Topsoil and organic material should not be present beneath your abutments. If the ground beneath your abutments consists of any organics, they should be removed and replaced with a well graded gravel.
If your site contains mostly clay and silt material, you have a decision to make. A good, hard clay can provide a good foundation, but it needs to be a good material. When rolled in your hands it should roll up into a ball, not flake away into pieces. A good test would be if you dig a 3 ft (1 m) deep hole with vertical sides and the sides hold together, the clay would be adequate for a bridge foundation. Bad clay that is excessively wet or does not hold together in a vertical wall will not be a good foundation for a bridge.
Gravel makes a fantastic bridge abutment foundation, but if possible you should use the in situ (in place) material. If you have to import and backfill loose gravel you will need to compact it in small lifts, say 6 inches (0.15 m), until it is solid.
Rock, if you are blessed with it, is the best foundation there is but it requires a bit of work to secure the bridge to it. If you are using a precast concrete block or jersey barrier foundation you will need to create a flat top on the rock, which is a challenge. After shaping the rock with a jackhammer (available as an attachment to an excavator), gravel with lots of fines will help to fill in the gaps in the rock and create that flat foundation. Like the gravel foundation, it will need to be well compacted. Similarly, if you are pouring a cast in place concrete foundation on rock, a good rock anchorage system consists of anchors every 12 inches (0.15 m). These anchors consist of drilling into the rock and placing rebar secured with epoxy.
If you have any type of rock foundation you should probably budget for an engineer.
Hopefully this answers some of your questions. If you need any assistance please do not hesitate to contact us at:
Roseke Engineering Ltd.
3614 – 18 Avenue North
Lethbridge, AB T1H 5S7
Phone (403) 942-6170
Attn: Bernie Roseke, P.Eng., PMP
Roseke Engineering Ltd. has designed many pedestrian bridges and has pre-designed bridge options available. We are licensed in B.C., Alberta, and Saskatchewan.
Speak Your Mind